The cockpit drill is the very first procedure you will be taught by a driving instructor on your first driving lesson.
Learning the cockpit drill will provide you with knowledge on all the relevant car safety aspects and controls. Much of your first driving lesson will be taken up by learning the cockpit drill, although most good driving schools should allow you to drive once the cockpit drill has been completed.
Learning the cockpit drill before your first driving lesson should help to reduce the time the instructor takes teaching you, therefore providing you with more time actually learning to drive. Reading these tutorials may also go some way into reducing the amount spent on driving lessons. Once the cockpit drill has been learnt for the first time, it should take no more than a minute or two to complete on subsequent driving lessons.
Car Instrument Panel
Before learning the cockpit drill, you may wish to take a look at the car instrument panel tutorial. This will explain the basics for the dashboard gauges. See:
Cockpit Drill Continued
Much of the cockpit drill relates to the majority of all makes and models of cars although certain controls such as side mirror adjustment controls for example may be operated and located specifically to a certain make and model of car. Such specific controls will be explained by your driving instructor.
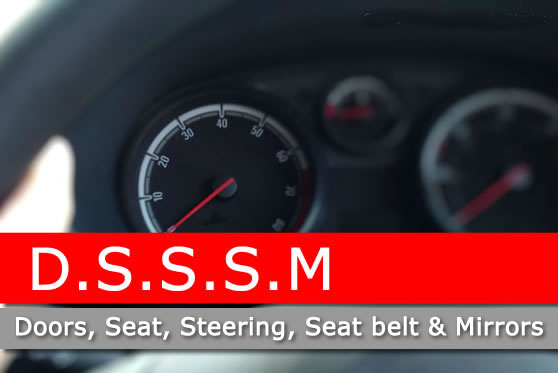
DSSSM
The cockpit drill consists of the Doors, Seat, Steering, Seat belt and Mirrors. To aid in learners remembering this procedure, it is abbreviated to DSSSM. See DSSSM and driving routines for the various routines that learner drivers should learn.
Cockpit drill – Doors
Ensuring all car doors are shut before moving off is essential as there is a chance that they may open whilst driving.
- Driver side door
Don’t be afraid to give it a good stern pull to shut it, although try not to slam it too hard. If you are in doubt that it is correctly shut, reach over to the door handle with your left hand and give it a tug. If closed properly, the door should not move, if the door moves slightly, you will need to open and shut it again ensuring that you pull a little firmer on the door this time. Before opening however, check in front and over your right shoulder to ensure there are no pedestrians or cyclists in the path of your opening door. - Passenger doors
Passenger doors will need to be checked using mirrors. When the doors are shut correctly, the side of the car that can be seen in the side mirrors should remain smooth and flush. If a door is not correctly shut, the side of the car will look uneven and not smooth. If you suspect that a passengers door is not shut correctly, either ask the passenger closest to shut it correctly or get out of the car and shut it yourself. - On a driving test
If you fail to shut your door correctly at the start of the test, the examiner will likely ask you to check your door. Most modern cars alert the driver of doors not properly shut by either an illuminated light on the dashboard or by a sound. If you move off and your door is incorrectly shut during a test, pull over in a safe and legal position and safely secure the car.
Cockpit drill – Seat
- Seat
The seat will need to be adjusted so that you can comfortably use the foot pedals. If operating a manual car, locate the foot pedal on the left side – the clutch. Using the ball of your left foot, press the clutch down to the floor until it stops. Grip the bottom of the steering wheel with your left hand and using your right hand use the seat lever to slid the seat either forward or backwards until you have a slight bend in the knee with your left leg. This is the ideal seat position to comfortably operate the foot pedals. Controls for sliding the seat forward or backwards are usually found under the front of the seat.
Cockpit drill – Steering wheel
- Steering wheel
The seat now needs to be adjusted correctly so as to allow you to comfortably control the steering wheel. Place both hands at the very top of the steering wheel as this is the part of the wheel that is the furthest away from you. You do not want to be too close to the steering wheel or stretched out too far as this will impede safe control in operating the wheel. The ideal position whilst griping the top of the wheel is to have a slight bend at the elbow in your arms. Keep one hand on the wheel and use the seat controls to move the back rest of the seat forward or backwards until this position is found. Back rest controls are usually found at the lower right hand side of your seat. - Head restraint
The correct adjustment of the head restraint can help to reduce neck injuries in the event of a rear collision. Most modern cars tend to have larger head restraint and for most drivers, the head restraint is in a good position by default. If you are using an older model car or are particularly tall, you may need to adjust. The centre vertical position of the head restraint should be in line with your ears to be most effective.
Cockpit drill – SEAT BELTS
- Seat belts
Driver and passengers must wear a seat belt whilst driving forwards on a public road unless medically exempt and have proof by certification. It is the drivers responsibility to ensure passengers of 14 years and younger are either wearing a seat belt or are appropriately and legally secure. A driver is legally entitled to remove a seat belt whilst reversing (including on a driving test) as a seat belt can reduce your ability to move in the seat and take effective all-round observation. Remember of course to re-apply the seat belt before moving forward again. Ensure that the seat belt is firmly clicked in-place and has no twists and turns in any part of the belt as this will reduce the belts effectiveness in an accident.
Cockpit drill – Mirrors
Finally, the mirrors need to be correctly adjusted so to give you as much rear view observation as possible. Your instructors car may have extra mirrors to enable them to have rear observations. Your mirrors of concern is the main interior mirror at the top centre of the front windscreen and the two door mirrors.
- Adjusting car mirrors: interior mirror
Sitting in your normal driving position, reach out with your left hand and grip the plastic surround of the interior mirror. Try not to touch the glass as this will put finger marks on the mirror, making it difficult to see out of, particularly at night. Try to keep in your normal driving position as much as possible including your head, adjust the mirror so you can see as much out of the rear windscreen and as little interior as possible. Essentially, you need to ‘frame’ the rear window inside the mirror. Unlike side mirrors, the interior mirror gives you an exact representation in terms of distance of what is happening behind you as the glass is flat. - Adjusting car mirrors: side mirrors
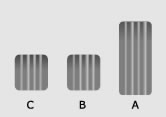
Again sitting in your normal driving position, adjust the side mirrors so that centre of the mirror is in line with horizon (see mirror adjustment for an example) and that there is a small sliver of the side of the car only in each mirror. Door or side mirrors are usually made from convex glass. This curved glass gives the driver a wider angle of view to see behind. Although this increases the viewing angle of rear observation it does not eliminate the car blind spot. Before driving off, changing lanes and on occasions making left or right turns, the appropriate blind spot must be checked. Failure to check the blind spot will certainly fail a driving test and increase the chances of an accident.
Cockpit drill controls
Now the basic cockpit drill has been explained, the instructor will now explain the basic car controls. Car controls are divided into 3 categories:
- Foot controls – description and operation of the accelerator, brake and clutch.
- Hand controls – correct use of steering wheel, gears and hand brake.
- Auxiliary controls – correct use of indicators. Other auxiliary controls include windscreen wipers / washers, lights, heaters and demisters although these are often explained at a later date.
Foot controls
Foot controls are the Accelerator, Brake and Clutch and from right to left can easily be remembered as ABC. The accelerator and brake are operated with the ball of the right foot and the clutch is operated using the left foot.
- Accelerator
The accelerator will often be referred to as the gas pedal during driving lessons as it is quicker to say. The accelerator is very light and easy to press and is used to increase the amount of fuel going into the engine. More fuel means more power. - Brake
The foot brake has much more tension than the accelerator. The brake needs to be used carefully and lightly. When you wish to stop the car, press the brake lightly and gently increase pressure until the car has stopped. - Clutch
The clutch is easier and lighter to press than the brake and is used to break the connection between the drive wheels and the engine so that gears can be selected. A description of how the clutch works along with clutch control can be found in the clutch control tutorial.
Hand controls
- Steering
Using the steering wheel correctly in terms of where you hold it is important not only for safety but is also assessed to a degree during the driving test. The steering a car tutorial offers learner driver the correct method for holding and steering. - Gears
The gears in a car allow you to increase and decrease speed and enable the car to be fuel efficient by selecting the appropriate gear. It is important to know where each of the gears are and how to correctly use them as detailed in the changing gears tutorial. - Handbrake
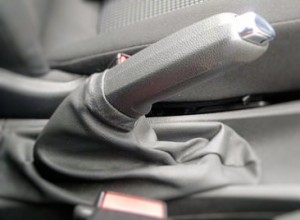
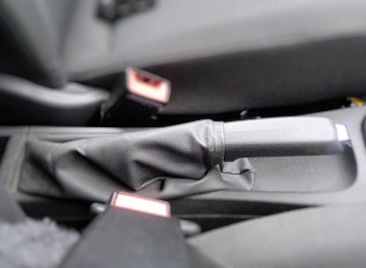
The handbrake or parking brake as it is also referred to secures the back wheels of the car by use of a simple ratchet system within the handbrake that tenses a cable to engage the rear brakes. Handbrake is to be applied when the car has been parked and if you are waiting in traffic for a period of time.
To apply the handbrake and secure the back wheels, the handbrake is to be gripped firmly using the left hand, pushing the button in with the thumb as you pull the lever up. Continue pulling the handbrake up until the lever becomes tense and release the button.
Be reasonably firm when pulling the lever but not excessively. Give a final tug of the handbrake once applied to ensure any slack is taken up and that the ratchet system is secure.
To release the handbrake, grip with the left hand, slightly pull the lever up and as you do so push the button in with your thumb. Place the lever down until it stops and release the button. Testing this should be done whilst your right foot is firmly pressed on the foot brake.
Note; some vehicle manufacturers may recommend in the vehicle owner manual to not press the button whilst applying the handbrake. This is to ensure the ratchet system is fully locked and secure once applied. Though it is acceptable to apply the handbrake in this manner, over time this will result in minimal wear on the ratchet system, potentially resulting in a unreliable handbrake mechanism.
Auxiliary controls
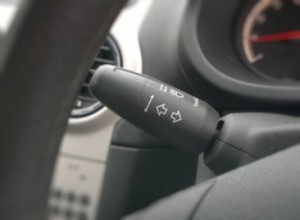
Indicators
Indicators are used to show others your intention of changing direction. During a driving test, the examiner will be assessing you to ensure you indicate in good time and that you cancel the indicator once the task has been completed. The indicator lever is usually found to the left side of the steering wheel.
Cockpit drill driving test
When time arrives for the driving test, all you should need to do when getting into the car with the examiner is put your seat belt on as you would have gone through the cockpit drill before driving to the test centre. The driving examiner will not expect you to run through the cockpit drill if it has been completed already.
If your car is a 3 door however and your instructor or another accompanying passenger is coming with you on the test, the instructor is likely to enter the car through the drivers side, moving the seat. Ensure that your seat is back in a good driving position and also check the mirrors again just in case they need altering.
A supervising examiner can on occasions also accompany yourself and the test examiner. The supervising examiner is also likely to enter the car through the driver side. The supervising examiner is assessing the examiner who is conducting your driving test to ensure the correct procedure is followed.
The driving examiner will ensure that their door is shut correctly and that their seat belt is correctly secured in place before the car is started. The examiner will not try and trick you in any way during their part of the cockpit drill. Usually, a driving test is taken over a 2 hour period; the first hour is to ‘warm up’ and the second hour is to arrive at the driving test centre in time and to take the driving test which lasts for approximately 40 minutes.
The cockpit drill and the examiner
Although a driving examiner is rather discreet in what they appear to notice during a driving test, they will be aware of any discrepancies on the cockpit drill. Badly adjusted mirrors or an incorrectly fitted seat belt for example will be noticed. Ensure that:
- all doors are shut
- your seat is correctly adjusted for pedals and steering
- the head restraint is positioned correctly
- your seat belt is properly fastened with no twists
- the interior and door mirrors are correctly adjusted before moving off
Car Instrument Panel
If you haven’t done so already, you may need to learn the basics of the car instrument panel. This tutorial guides you through the various gauges that are found on the dashboard. See:
Thanksgiving to your best courses tutorial for new learners.
Many thanks as this really help, my Practical Exams is coming soon.
Excellent site which I refer my learners to regularly.
Just one comment on the above text, I always tell learners to say, ‘head restraint’, which conveys its correct role as a safety feature, rather than ‘headrest’, which would suggest a more leisurely function. :o)
Hi Mark,
Glad you find the site useful. Yes, you’re right about the ‘head restraint’. Thanks for pointing that out, I shall amend it.
Very useful instuctions! Recommended here to my students.
Hi Piston.
Glad you find the site useful.
This has opened my eyes, I have been driving for the last 18yrs but I had never come across this word cockpit drill! I am actually going to do my driving practicals soon next week…… I am grateful.
Hi Godfrey,
No problem. The Driving Test Tips website has all the tutorials covering all elements of the practical test should you need them. Good luck on your test!
I wish I’d found you at the beginning of my driving lessons. But I’ve learnt so much in a short time realising that my driving instructor wasn’t that great with preparing me for the lessons and for the driving test.
Hi Esperance,
Hopefully you’ll learn plenty from the website. If you need any help and have any questions, feel free to ask away.